Help Topics
ECLINTELANALYSIS - Lintel Analysis
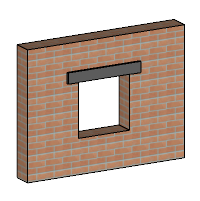
This part of user manual describes how to use ECLINTELANALYSIS for the analysis of Lintel. ECPlus applications are designed as wizard type which is a step by step guided input procedure. If you are new to ECPlus applications, click here for general guidance.
Prerequisites: The user is expected to have a basic understanding of foundation design concepts.
The minimum input data required to use this application is as follows:
- ❶ Type and Dimensions of masonry wall
- ❷ Openings in wall
- ❷ Load data
Dimensions
This page allows to enter the dimensions of the solid masonry wall, if wall type is selected as solid in Material Property.
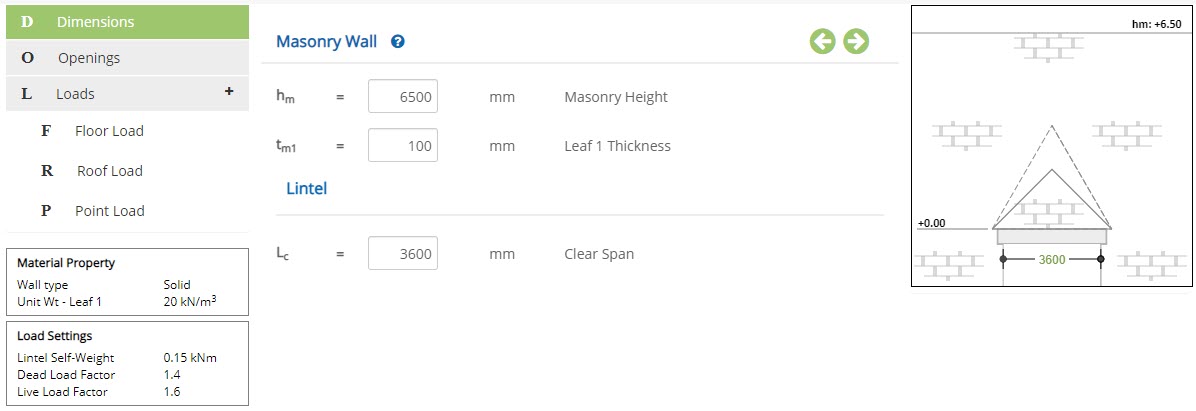 Masonry Height - hm
Enter the height of the masonry wall.
↔ Range: 1800 to 15000 mm
Enter the thickness of leaf 1.
↔ Range: 75 to 1000 mm
Enter the clear span of the lintel.
↔ Range: >= 500 mm
This page allows to enter the dimensions of the cavity masonry wall, if wall type is selected as cavity in Material Property.
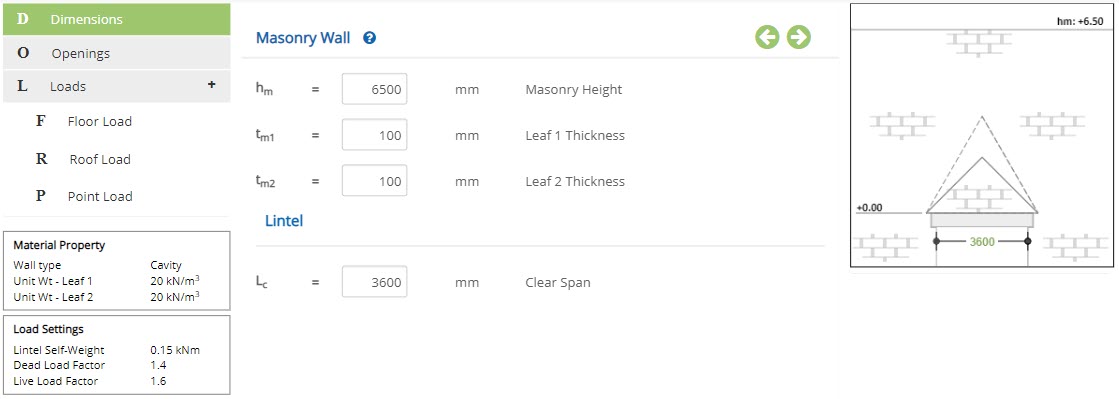 Leaf 2 Thickness - tm2
Enter the thickness of leaf 2.
↔ Range: 75 to 1000 mm
This page allows to enter the dimensions of the insulation masonry wall, if wall type is selected as insulation in Material Property.
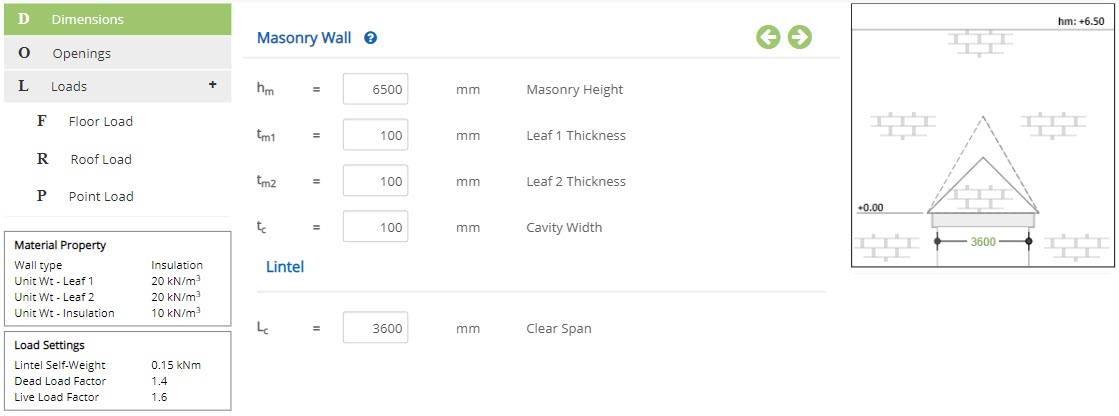 Cavity Width - tc
Enter the width of the cavity.
↔ Range: 75 to 1000 mm
Openings
This page allows to enter the details about openings in the masonry wall.
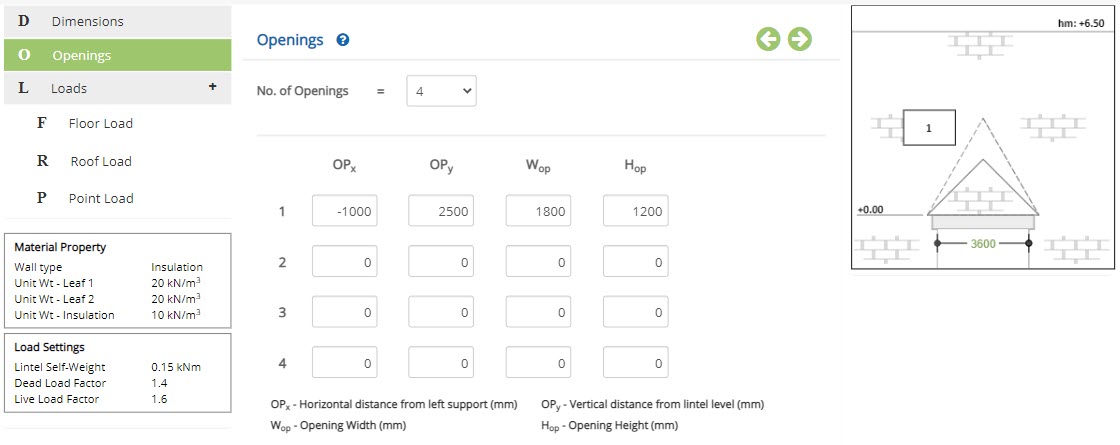
▽ Openings: Choose the number of openings in wall from the drop down menu.
Horizontal distance from left support - OPxEnter the horizontal distance from the left of support.
Vertical distance from lintel level - OPyEnter the vertical distance form the lintel level.
Opening Width - WopEnter the width of the opening.
Opening Height - HopEnter the height of the opening.
A maximum of four openings can be provided.
Loads
This page allows to enter the load data for analysis.
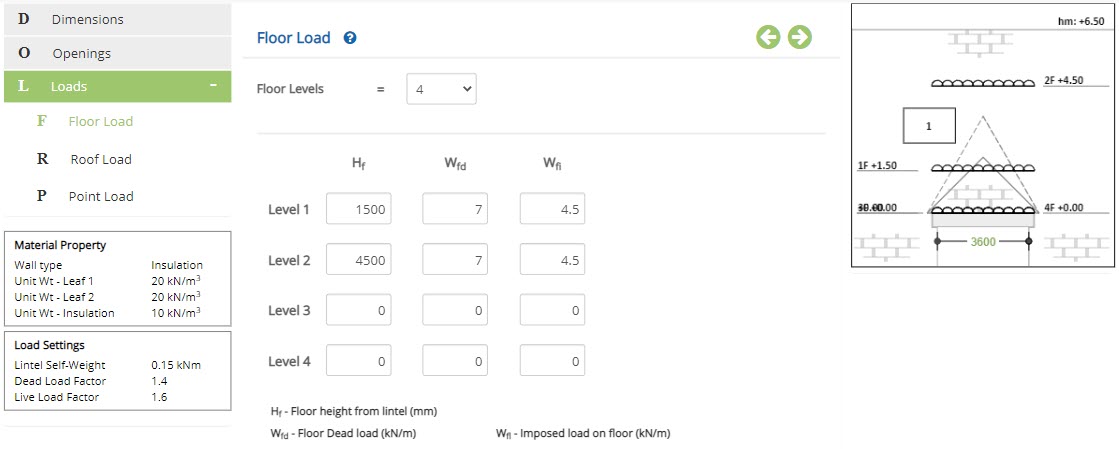
▽ Floor Levels: Select the number of floor levels from the drop down menu.
Floor height from lintel - HfEnter height of the floor from lintel level.
Floor Dead load - WfdEnter the dead load at the defined floor height.
Imposed load on floor - WflEnter the imposed load at the defined floor height.
A maximum of four floor loads can be provided with two sides on each floor load.
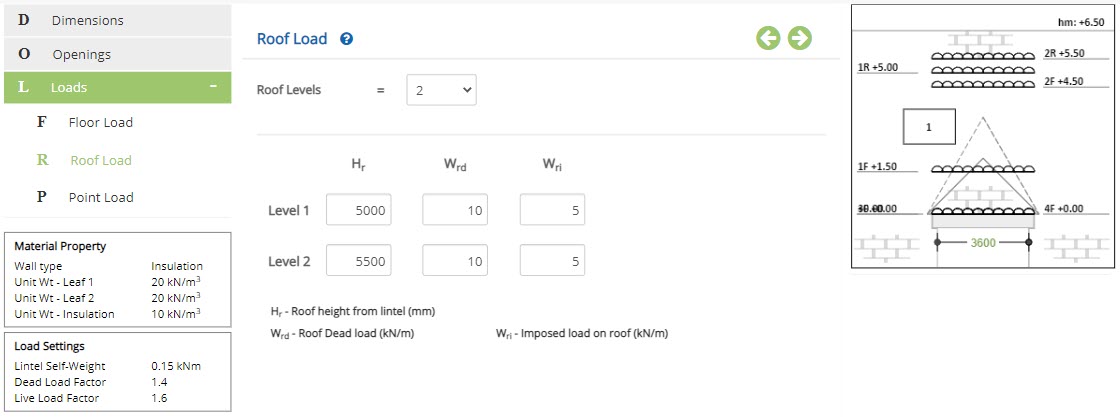
▽ Roof Levels: Select the number of roof levels from the drop down menu.
Roof height from lintel - HrEnter height of the roof from lintel level.
Roof Dead load - WrdEnter the dead load at the defined roof height.
Imposed load on roof - WriEnter the imposed load at the defined roof height.
A maximum of two roof loads can be provided.
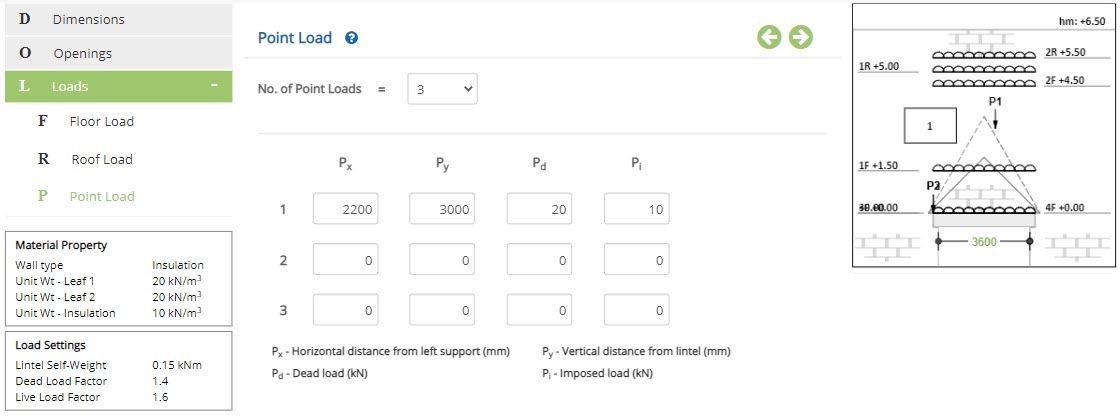
▽ No. of Point Loads: Select the number of point loads from the drop down menu.
Horizontal distance from left support - PxEnter the horizontal distance from the left of support.
Vertical distance from lintel - PyEnter the vertical distance form the lintel level.
Dead load - PdEnter the dead load acting on the defined point.
Imposed load - PiEnter the imposed load acting on the defined point.
A maximum of three point loads can be provided.
Design Setting
Setting for various Design Data such as wall type, load factors are presented in this section. This setting pop-up can be accessed by clicking the bottom panel below the left navigation.
Material Property
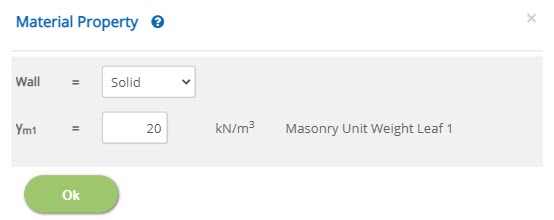 Wall
WallSelect the type of wall from drop down.
▽ Solid : Select this option to describe masonry wall as solid wall.
▽ Cavity : Select this option to describe masonry wall as cavity wall.
▽ Insulation : Select this option to describe masonry wall as insulation wall.
Enter the masonry unit weight of leaf 1.
↔ Range: 5 to 50 kN/m3
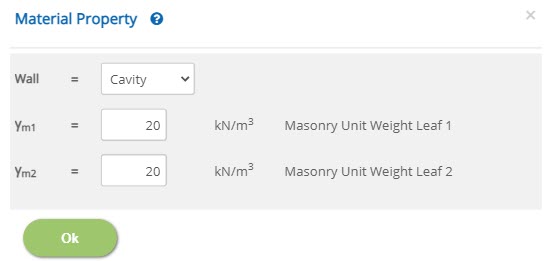 Masonry Unit Weight Leaf 2 - γm2
Enter the masonry unit weight of leaf 2, if wall type is selected as
▽ Cavity or ▽ Insulation.
↔ Range: 5 to 50 kN/m3
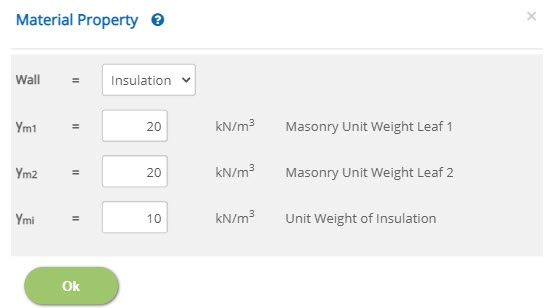 Unit Weight of Insulation - γmi
Enter the unit weight of insulation, if wall type is selected as
▽ Insulation.
↔ Range: 5 to 50 kN/m3
Load Settings
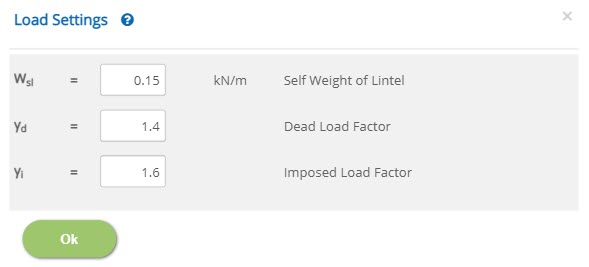 Self Weight of Lintel - Wsl
Enter the self weight of the lintel.
↔ Range: 0 to 9 kN/m
Enter the factor for dead load.
↔ Range: 0.5 to 3
Enter the factor for imposed load.
↔ Range: 0.5 to 3
Error Handling
Errors and Warnings are generated to prevent any inadvertent error in the input data. This section describes how to handle the errors and warnings. These errors are displayed at the bottom of the input page when the data in one or more input fields invalidate each other.
- Note: Out of range errors are displayed next to the input field.
| # | Error | Reason | Solution |
|---|---|---|---|
| 1 | Error : Roof level should not be greater than masonry height Note: Applicable for number of roof loads considered. | Height of the roof side is greater than the overall height of the masonry, if roof load is considered. | Enter the roof side height lesser than the masonry height. |
| 2 | Error : Floor level should not be greater than masonry height Note: Applicable for number of floor loads considered. | Height of the floor is greater than the overall height of the masonry, if floor load is considered. | Enter the floor height lesser than the masonry height. |
| 3 | Error : Opening should always lay below the masonry height Note: Applicable for number of openings considered. | Height of the opening exceeds the masonry height, if opening is considered. | Enter the opening height, such that opening lies within the masonry height. |
| 4 | Error : Point load cannot lay beyond masonry height Note: Applicable for number of point loads considered. | Location of point load exceeds the masonry height, if point load is considered. | Enter the point load coordinate, such that opening lies within the masonry height. |
| 5 | Error : Floor level interacts with opening. Note: Applicable for number of floors and openings considered. | Height of floor side intersects with opening provided. | Enter floor height and opening, such that they do not intersect each other. |
| 6 | Error : Roof level interacts with opening. Note: Applicable for number of roofs and openings considered. | Height of roof side intersects with opening provided. | Enter roof height and opening, such that they do not intersect each other. |
| 7 | Error : Point load interacts with opening. Note: Applicable for number of point load and openings considered. | Location of point load intersects with opening provided. | Enter point load and opening, such that they do not intersect each other. |
| 8 | Error : Opening interacts load zone Note: Applicable for the opening number highlighted | The highlighted opening interacts with the load zone shown. | Opening should be located such that it doesn't interacts with the load zone. |
| 9 | Error : Opening cannot lay entirely in the interaction zone Note: Applicable for the opening number highlighted | The highlighted opening is laid entirely inside the interaction zone. | Opening should be located such that it doesn't lay within the interaction zone. |
| 10 | Error : There is a clash between openings | Two or more openings are clashing with one another. | Enter the opening data such that they should not clash with one another, when more than one opening is provided. |
| 11 | Error : Opening is invalid Note: Applicable for the opening number highlighted | TODO | TODO |
